Create Sample Barcode using Photoshop !!
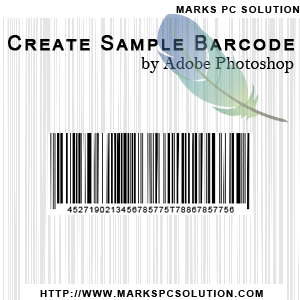
In this post, I'm gonna publish a funny tutorial of Adobe Photoshop. Now I will show you how to create a sample barcode (fake) by Photoshop. It will not be a real one but look like an original barcode. And maybe all of you know that original barcodes are machine readable. A real barcode includes product information like country of origin, manufacture and expiry date etc.
I'm using Adobe Photoshop CS5 for this tutorial. But so far I know, any version of Adobe Photoshop will produce the same result for you. Okay let's start -
- Run Adobe Photoshop and open a new file with following settings
- Choose Width 250 px, Height 100 px, Resolution 72, RGB Color Mode with 32 bit, White Background and hit OK.
- Now you will get a white rectangle in the screen.
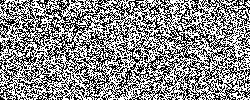
- Go to the Filter Menu > Noise > Add Noise . . . > Amount 400 > Distribution - Gaussian > Select Monochromatic > Hit OK.
- You white rectangle will take the following look.
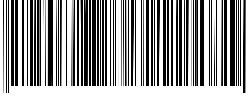
- Again go to the Filter Menu > Blur > Motion Blur . . . > Angle - 90 degree > Distance - 999 pixels > Hit OK.
- Look, I've just cut the bottom part of the image with Rentangular Marquee Tool. Choose Rectangular Marquee Tool from the toolbar. Now click and drag as my image shows above leaving a small portion from left and right part. Hit on the delete button and choose white color.
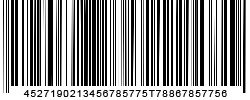
- Press T or simply open the Type Tool > Choose Arial font with 10/12 pt size > Type some digits randomly as below.
We're almost done. But you can't save it! Because at the very beginning, you chose 32 bit color mode. But if you want to save the image as JPG or PNG, you must select 8 bit color. Then why I suggested to use 32 bit? Because 32 bit will give you a better look which 8 bit or 16 bit can't.
If you choose 8 bit or 16 bit color, there will be no problem. You can directly save it as JPG or PNG. But the quality will fall somewhat.
Then How to Save?
- Look at the layer panel. Possible there are two layers - Text and Background. Press Shift key > select both the layers > Click right mouse button > hit on Convert to Smart Object.
- Now press Ctrl + A > Ctrl + C > Ctrl + N > In the Color Mode - Choose RGB and 8 bit > Hit OK.
- Press Ctrl + S > Select either JPG or PNG > Hit OK.
I prefer PNG due to its brilliant quality.
Note: If you avoid using 32 bit color mode while opening the new document you will not face any problem while saving it. Simply use 8 bit when you create the document at the beginning. Then you can easily save it just after completing the barcode. But in that case, the bars will not be so clear.
Do you like this tutorial? :)
Stay with Marks PC Solution to get more interesting IT topics!
Nhãn: Adobe Photoshop Tutorial, Create Fake Barcode by Photoshop, How to Create Barcode, munnamark.blogspot, Tutorial


0 Nhận xét:
Đăng nhận xét
<< Trang chủ